Wheel bearings


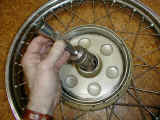
First removed the bearing retainers, RH tread on
this model. Needed patience and some force, but managed it without destroying anything.
The L bearing was very old & of the open type, and the ball race had rusted
extensively. After heating up the hub with a hot air gun, the RH bearing was easily driven
out using the wheel spindle.
 
Then the LH bearing was driven out using an adequately sized pipe.
  
After cleaning & reheating the hub, the
bearings (fresh from the freezer) were easy to push in using the old bearing as a tool,
together with the extension bar from a socket set. Make sure they bed in properly, &
lubricate the inside of the hub to prevent rust (modern enclosed bearings do not need any
external grease) and tighten the retainer real good, I use medium strenght nut locking.
Having postponed this for a year, in fear of what extensive job it might be, to my
amazement the whole process took less than 2 hours, including taking of the wheel.
|
Front brake
How much is one's life worth... as much
as was lately spent on the front brake? Up until now I was quite worthless, so had to do
something about that. First of all I sent the brakeshoes to SRM for relining. Received
them back in pristine condition, together with new springs. All seems perfect. The brake
plate is another example of fine vintage engineering, perfectly working & great
cosmetics after 50 years. A few rounds of Autosol & some genuine vintage British
grease was all that was needed. BSA service sheets 212 A\B\C\D gives good description of
wheel\hub\brake procedures.
  
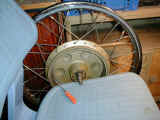
A quick test of the wheel was done by simply
lying it across "something" in a way that the shaft lays still, then making the
wheel revolve. Then I could do a quick check of the brake area by placing a feeler of some
kind, looking for any spots that may need attention if not perfectly round. The bearings
must be in top shape to perform any testing. If severely pitted or uneven the hub may
need some specialist work. In my case all looked good (enough...). Some surface rust
inside the rim, gave it a light coat of rust killer. Checked the spokes for even tension
(roughly), had a look at the spoke nuts for any sharp edges, and fitted a new rim tape, a
new inner tube & the Avon Roadrunner universal 4.10-19 that I will try both
front & rear, have no idea how they will behave, but assume it will be safer than the
worn out old stuff that was on the bike until now.


When fitting the wheel with brake, an
important adjustement is done by loosening the fulcrum adjusing pin, then holding the
brake lever real hard to centre the brake pads, then tightening the fulcrum pin while
still holding the brake lever. The easiest way to make a cable length fit perfectly if a
little too short is to remove some of the metal outer tubing by bending it then cutting it
carefully with a file.
|